Posted in crafting, Embellishments, Embossing, photos, Scrapbooking, trend, Uncategorized, youtube

Hoppin on the Trend Train, Woot! Woot!

How many of you are children of the 1970’s?  I grew up in the time of 8 track players, turning into cassette players, turning into CD’s.  I saw the wonder of the new VHS, the ease of recording  your tv shows on those big clunky tapes for later visual pleasure; the advent of MTV and cable tv.  Remember those big remotes, with the cord that plugged into the tv??

I was a total geek in my middle school years and office classes were my gig.  I learned how to type on those old, clunky manual typewriters, with the sticky keys, and the strips of correction tape that you had to slide in, backspacing to your mistake, and retyping over it to cover up the carnage.

Then came sixth grade.  Behold, the gates of Heaven opened, angels started singing and joy was bestowed upon all because the school felt generous enough to purchase three glossy, sparkly, new (to us) electric typewriters!  I spent the majority of that year cycling through turns on the fancy machines!  Oh the ease of that 60 lb machine, the loud pounding, the mistake correcting.  Pure 12-year-old nirvana.

Fast forward three decades  (bye bye walkman, portable cd players, brick phones, stereos that stand three feet tall, newer electric typewriters with daisy wheels, blocky computer screens with DOS and mumbo jumbo lit up in green, flip phones, first edition IPODS, IPOD mini, IPOD Nano, IPOD yadda yadda yadda) to the magic and glory of all things techy in 2016.

And what do you suppose the hot trend of this year is…  a We R Memory Keepers Typecast Print Typewriter.  You can own and use this magnificent machine for the minuscule price of $199.00

I guess everything old is new again, right?

Like I said before, I love trends.  I just can’t spend money on the newest, biggest and baddest, without doing a little DIY research first.

It took me two months of occasionally cruising Craigslist and my local second-hand stores until I finally found this bad boy:

wp-image-1304148020jpg.jpg
All the rage of secretaries everywhere…in 1977.

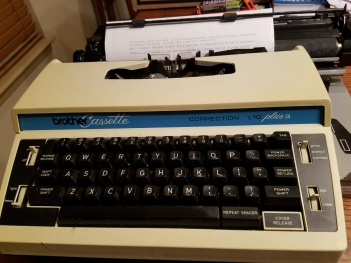
Yes.  You guessed it.  A 1977 Brother Cassette Electric Typewriter.  One of the first models with an automatic correction function.  Jelly yet????  This baby was pristine, still in its original carrying case, with its cassette ribbon that was still in workable condition.  The type in the photo was probably the first anyone had seen in 20 years.  Goodwill price, $12.00 with a 7-day return policy if I wasn’t satisfied.  Bam!  Sold.

The problem?  This technology is so old that they don’t make the ink cartridges for it anymore.  Long story short, I did some You Tube research and I found out that these cartridges are quite easy to pop open.  If you can do that, you can buy a generic spool of ribbon (which I purchased at Staples for $7.99) and transfer out the old ribbon, and replace the new into the original cartridge.

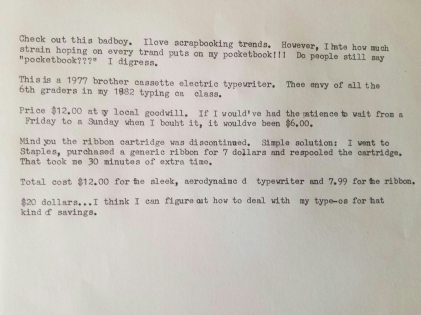
I thought – why not. Consequently, it took me all of 30 minutes to fix the ribbon, and the results look great:

wp-image-1474844616jpg.jpg
Yes. There are type-os.  I wasn’t really concerned about fixing them for the purpose of this photo.  lol

What this machine doesn’t have:

  1.  A correction function.  (Anyone know where to find those oldy moldy correction strips?)  I did save the old ribbon and I thought I could cut it up and use the white half for corrections in a jiff.  If all else fails, and I actually need to correct something, I can use white out.
  2. A hefty price tag.  I spent $12.00 on the typewriter, and $7.99 on the ribbon.  If typewriters go out of scrapbooking style next year, I’m out $20.00 large.  So, I’m not sweating this.

It does however have character, it’s not in a landfill, it’s 60 lbs, so I’ll never lose it.  Use the $180.00 you save to go on a We R Memory Keepers Scrap Haul, I mean they do make really cute awesome stuff!  I just couldn’t force myself to pay $200.00 for 1977’s cutting edge technology.

Even thrifty scrappers can figure out a way to hop on the newest trends without depleting their savings!

Enjoy!

Posted in crafting, Embellishments, flip book, fussy cutting, Scrapbooking, youtube

To Toss or Not to Toss

So you cracked open a new paper pack.  You assembled the mother of all projects.  You pat yourself on the back because you did dang good.

wp-image-1207021615jpg.jpg
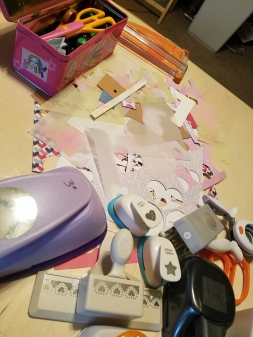
The end result is a pile of pretty big paper scraps.  But the problem is, if you scoop your paper up and put in a box with other scraps, it quickly grows into the big monster in the room that spews out of control, all over your desk, all over your file cabinet and all over the floor.  So what do you do – toss it, or keep it?

Every scrapper goes through this dilemma.   There are many opinions on this subject.  Some people set size limits and toss the smaller pieces; some people save everything; some people toss it all.

I’m not going to lie.  I save a LOT of paper.  This blog post is for the paper hoarders (C’est Moi!)

I thought I would give scrap savers two different ideas for using up those pesky scraps.  After all, every scrap is precious and important.

Idea No. 1:  Cut and punch that stuff up – make embellishments!

I’ve talked about this before.  Use your punches.  Play with shapes.  Don’t be afraid to cut your paper with your scissors, layer and add your own touches!  I used stitching, homemade enamel dots, vellum, and I fussy cut sentiments from an old piece of paper. In the past I’ve dry embossed, heat embossed and stamped my scraps.

Gather your shapes in funky, awesome shapes; glue those pieces of paper together first, then sew it up!

Idea No. 2:  Make a flip book or journal!

This one is fun because it doesn’t take much forethought.  These flip books are great because you can use all different kinds of paper; cut it into different sizes and choose whatever embellishments you have on hand.  Just grab some rings and punch  holes in the paper and put it all together.  Easy McPeasy!

Check out my first YouTube Video that shows off the flip book I made this weekend.  It’s a lame-o video, but it shows the book off!

Remember:  YOU CAN’T SCREW THIS STUFF UP.  If you get frustrated, put it away for a week, then go back to it.  You will be so surprised at the inspiration you gain over a week’s time!

Or… hey, toss it.   Whatevs!  Life is too short to stress about it.  Throwing the paper away doesn’t seem like the best idea to me but it does leave room for all the new paper and new supplies you can buy!

Show me your projects!  Happy Scrapping!!!

Posted in Uncategorized

Daily Prompt: Careful

via Daily Prompt: Careful

Be careful.

Why?  Because it’s an unsafe world.  Because we know about bad things happening IMMEDIATELY after they happen.  Because we don’t want to be a victim.

We don’t want to be shortchanged at a cash register, we don’t want cancer, we don’t want to be broken hearted, we don’t want to be shot while sitting in a movie theater.

So we sit in our homes with our phones and computers and surf the net and read about other people, other victims, others who weren’t as careful as we are.

Is it worth it?  When we are on our death bed, will we feel like our carefulness has given us a satisfactory existence?  Will this daily prompt turn into regret?

As people lock themselves in their homes with their electronics and study the reasons why it’s not safe to be anything other than careful we will find that people will withdraw more and more from each other.

That doesn’t seem like a very satisfactory life to me.

Careful


Posted in crafting, Embellishments, fussy cutting, Life, memory, photos, Scrapbooking, Uncategorized

Scrapbooking on a Dime – Buy a Paper Pack (Deeply Discounted, of Course) and Fussy Cut the Heck Out of It.

Note:  There is ABSOLUTELY NOTHING to be ashamed about when you use a 20-25% off all regular price and sale items coupon, and stack it with an item on sale.  Remember that.

 No one should pay full price for their craft supplies.
**The more you save, the more you can buy!

wp-image-274228254jpg.jpg
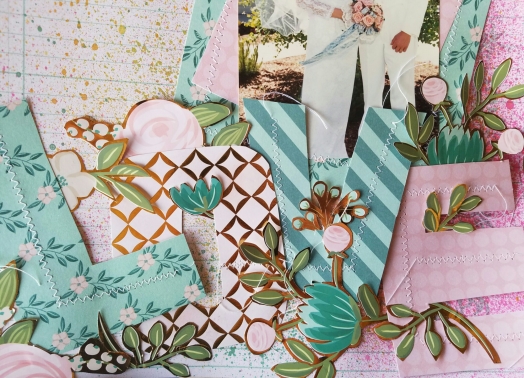
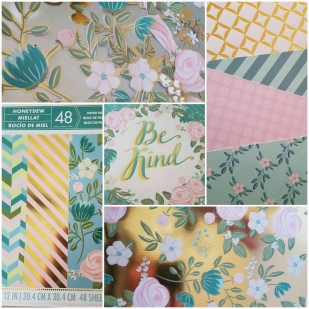
This is a picture collage of a paper pack and its contents I bought at Michael’s this summer.  The pack was full of beautiful colors and designs that were gold embossed.  On this particular day, Michael’s had their paper packs that were usually $19.99 marked down to $5.00.

I fell in love with this paper – however, I would never pay $19.99 for this paper.  When I saw the gold flowers in the bottom right corner of the collage,  I immediately thought… I can fussy cut up and use every, single, inch of that piece of paper and make my own embellishments.

So what is fussy cutting?  It’s taking designer paper, a pair of sharp scissors, and cutting around every shape or design on the paper to use as embellishments on a scrapbook layout, or for a card, or for any other craft your lovely heart desires.

I am not a great fussy cutter.  But, this is what I came up with:

The amazing thing about this hobby is you don’t have to be great at anything because there are NO MISTAKES in scrapbooking.

The details:

I chose a paper background that looked like ledger paper and decided to spray some shimmer mist on the background.

I cut four, 4″ x 4″ squares from the papers you see in the collage above and cut out the letters L O V E.  I didn’t use any template.  I just went for it!

I decided to add a little zig zag stitching for posterity (because it’s all about the zig zag.)

THEN I chose a photo.  Funny huh?  I did all of this without a photo in mind and ended up choosing an extra wedding photo I had because the roses matched.  A 25-year-old photo was resurrected from a photo box.   Funny how that works out, huh?

So this is the final project, sans journaling.

Supplies Used:

Paper Pack – $5.00 (And I only used six sheets of it.)

Recollections Shimmer Mist – The Boho pack of five I bought this summer.  Regular price $19.99, marked down 60%, and I combined a 25% off regular and sale items coupon to pay around three bucks.  BAM!

Elmer’s Glue Stick – $.25 bought during Back to School Sale

Sewing Machine – I already had it.  BUT You could hand sew too if you want to incorporate that look and don’t have a sewing machine.

Don’t let being on a budget hold you up!  Get out there!  Look for the deals!  Get to scrapping!

wp-image-1959474741jpg.jpg


Posted in crafting, Embellishments, Embossing, Life, photos, ranger, Scrapbooking, Uncategorized

Scrapbooking on a Dime -Stash Busting and Embossing

The paper pieces pile up in the box, with good intentions.  The crafting product piles up in the cupboard, good ideas forgotten.  Life causes it, and my life has been nuts lately.  So nutty that I have temporarily misplaced my crafting mojo.  My craft room has paid the price for my misgivings.  It’s a dump.

Consequently, I have spent the last two weeks punching circles, butterflies, squares and using my Diamond Press to cut tags, stars, and hearts.  Which leads me to where I was last night.

I was sitting in front of my television, enjoying a television series I recorded in February (The People vs. OJ – way interesting, btw) and found myself punching holes in more scraps.

Then inspiration struck.  I thought Dena… you have a drawer FULL of embossing folders and you haven’t used them in over a year!  Emboss those scraps.  Give them different textures and design, throw them on a sheet of paper and see what happens!

So I grabbed my Sizzix Texture Boutique that had about an inch of dust on it and went to work.  The following pictures show the end product:

Tip:  You know you don’t need a punch to cut circles, squares and ribbons.  Flip that page over and trace your shapes, or just eyeball what you want to cut.

I got a little sassy with the ribbon and decided to use a brayer (which had an inch of dust on it as well) and some white embossing powder to make the raised emboss image pop.  By the way, don’t you just love my sewing?   I did this at 1 am with limited light.  I didn’t care, this girl was on fire.  (Sang in my best Alisha Keys’ voice.)

Emboss patterned paper?  Sure, ok!  Glue it all together.  Use whatever glue you want.  I used an Elmer’s glue stick.  Why make things complicated, right?

I love the little navy blue dot too.  Everything just combined together well.

Lastly, I had this design on a boring white background, so on  a whim, I grabbed some Ranger Distress Ink, and put it to work.  Why not, right?

Oh ya…about the photo.  I didn’t even have this one in mind when I started doing this layout.  The photo of my son trying to do a selfie, before selfies were a selfie (2003) stood out to me as silly, colorful and fun.


Other background decorating ideas could include, stamping and embossing a design on the white paper then distress inking over the top of it, or you could handletter a title (I’m working on mastering that.)  My point is, this layout cost me literally nothing.  It didn’t come from a kit.  It actually came from a pile of leftover paper that was heading to the garbage can, had I not been so anal retentive about wanting to recycle whatever use I could out of it.

Don’t be intimidated by all of the gorgeous, professional layouts you see people show on the internet.  Scrapbooking is about fun.  Make it fun first, then see where it goes from there.  Show me your layouts!  I’d love to see.

Posted in crafting, Embellishments, memory, Scrapbooking, Uncategorized

Scrapbooking on a Dime

I am a member of several Facebook scrapbooking and journal groups.   I love to see the input of fellow lovers of this craft.  I love to see their ideas and tips.  I also love their process videos that are on YouTube.  My favorite groups welcome people to share the links to their videos and blog posts.  I have learned that scrapbooking and paper crafting is a huge hobby loved by many people, all over the world.  

Another thing I’ve learned is a lot of people love to post videos of “scrapbook hauls” aka pictures of piles of scrapbooking supplies that they buy on discount at scrapbook stores.  I have been guilty of doing this a time or two as well, but lately, I’ve noticed another trend.

2654c50588537af31ce091f6848a142e

People are posting their finished projects, apologizing that they aren’t as good as other people’s projects due to lack of supplies, lack of imagination, lack of talent, or whatever. I find this to be so sad.  I feel like every effort made to preserve a memory is a beautiful work of art.  I can’t change how someone feels about their own personal work, except to leave sweet comments for them on Facebook, so I thought I could help the people who think their work isn’t good enough because they don’t spend hundreds of dollars a month on supplies.

Hence, this post…

While I have been known to ransack a craft store sale, I am a very fiscally anal retentive crafter (aka “thrifty”.)  LOL!  I will take apart my scraps until I obliterate a piece of paper and there is nothing left.  So, I thought I would start posting about ways to recycle scraps into pieces parts that can be turned into awesome embellishments!  (Way more awesome than you will find in any kit, or at any craft store)

So, here you go… awhile back I did a Project Life spread wherein  I incorporated some wp-image-1070841361jpg
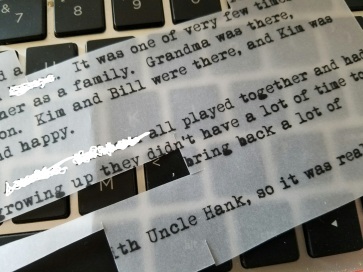
typewritten text I had done on my pc (using a free font, I will talk about on another post later) and printed on some vellum.  I accidentally printed the text twice leaving me with a huge piece of wasted vellum.

What’s a thrifty crafter to do?  I love vellum and the typewritten font was so pretty printed on it.  I thought, why not cut phrases out of the vellum and save them for future layouts?

Swp-image-950219235jpg.jpg
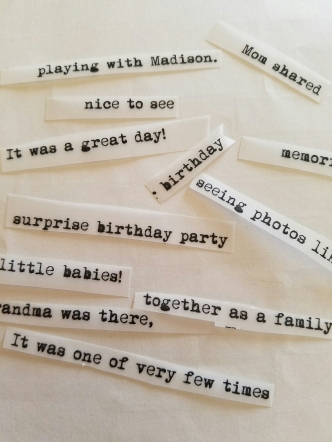
o voila!  That is officially my first “Scrapbooking on a Dime Tip.”  Cut apart phrases from old work that you don’t need or are going to throw away and save for future layouts.  Here’s the other thing also, you never know what kind of brilliant inspiration you will get from these partial phrases.  I came up with at least four scrapbook ideas just by cutting this paper apart.

You can also fussy cut wrapping paper, or phrases from magazines and old books.  The possibilities are endless.

And…

Be proud of you and your work!  Show me your stuff, I’d love to see it!

Posted in crafting, Life, memory, Scrapbooking, Uncategorized

My Very First Layout, Ever.

Some time back in 2002- about 13 years ago, my Dad, whom I had just reconnected with sent me a huge box of scrapbooking supplies, I believe it was for my birthday. I was turning the big 3-2.  Up until that point I had always wanted to document my life but was younger, had young kids, this was pre internet blogs and groups and I had no direction. His gift gave me that direction.

Flash forward to 2016 –  My Dad is a good friend of mine, and a close confidant.  I am so happy that I met him at the age of 30, and he has embraced my family, expressed his regret of not being there for me sooner, and life fathershas moved on.  Also…because of him, I am a certifiable craft junkie. I have pages of layouts I’ve made, I’ve made albums for people as gifts, I have piles of printed out photos and old albums full of photos waiting to be scrapped. I have a legacy to leave to my kids (whether they are interested now or not, haha!)

Appropriately enough, this is my very first ever layout. And is perfect for Father’s day! I made this after a hunting trip my husband and kids took together. This page shows how awesome of a dad my husband is to my kids. Who knew that a box of (was it Creative Memories??) stuff sent so many years ago would lead to what I have today. It also shows how artistical (this is now a  word, people…say it with me “artistical”) I have become.

The earlier layouts may seem less skilled, less extravagant, but they are just as important.  I hope anyone reading this takes that with them.  Every memory matters.

Happy Father’s Day to all of the awesome, amazing dads out there!  

Posted in crafting, Embellishments, Scrapbooking, silhouette

#TBT. Reason No.40 Why I Love My Silhouette Cameo

Why??  Well, because you can make gifts on the fly!  (I’m a poet and didn’t know it!!)

image

Why not buy a few flower svg files from the Silhouette Design Store and alter them by making them different sizes. You can cut the files into pretty patterned paper; and use brads, beads, glitter, buttons and stickles for the centers.

Grab a cheap foam wreath at the dollar store and use that glue gun.

Joila!  A gift for mom!

Posted in crafting, Embellishments, ranger, Scrapbooking, Uncategorized

Blending my Ranger Distress Ink

Shhhhhhhh don’t tell my hubby.  I’ve been on a little spending spree.  I have developed a love for these Ranger Distress Inks!  I also caught an amazing sale through Joann.com and got them for virtually half off (so I ordered LOTS…every girl needs LOTS of distress markers.)

image

I decided for my first project I would dabble with some watercolor paper.  I took a flower stamp I picked up at Michael’s last year and I embossed flowers all over the paper with glittery white embossing powder.

Then it was time to play with the markers.  I  colored and colored and painted and distressed and drew flowers, and scratched my head, and colored and colored some more and this is what I came up with:

image

What do you think???  Not bad for just messing around.  Tell me, do you think people would be interested in which markers I used?  Would YOU BE?  🙂

I love my crafting addiction.  Some people go to the bar after a long day at work to unwind.  I pull out my paper,  Just sayin!

Posted in crafting, Embellishments, Scrapbooking, silhouette

DIY Stencils!!


image

I may be showing you something that’s already been done 1,000 times on the YouTube. But, for me it’s new!

For those of you wondering if you should purchase a Silhouette Cameo, I have one good reason… You can make your own stencils!

I found acetate at my local craft store, 20 –  12 x 12 sheets for a dollar. They had weird designs on them, but I didn’t care. They cut the same.

I bought 40 sheets, and I’ve been cutting them on my Silhouette and turning them into my own homemade stencils.  This is the one I did tonight. A Silhouette is well worth the money.

Using some Recollections Pigment Spray Inks I bought at Michael’s, I made this in a matter of minutes!

image

If you’ve been sitting on the fence about buying one, hop off and have some fun like I am!